Quilling Terms For The New Quiller
17 Aug


Looks like the Quilling bug has bitten you! Why not start with understanding the terms you will come across, either while shopping for tools and material or going through tutorials?
Scroll down to discover all there is to know about Quilling tools and terminologies:
Border Buddy: You might want to create paper rings of different sizes for a quilling design and then fill it later. A border buddy helps you create the base ring shape. Stacked Quilling Forms and Dowel Forms are alternatives to Border Buddy
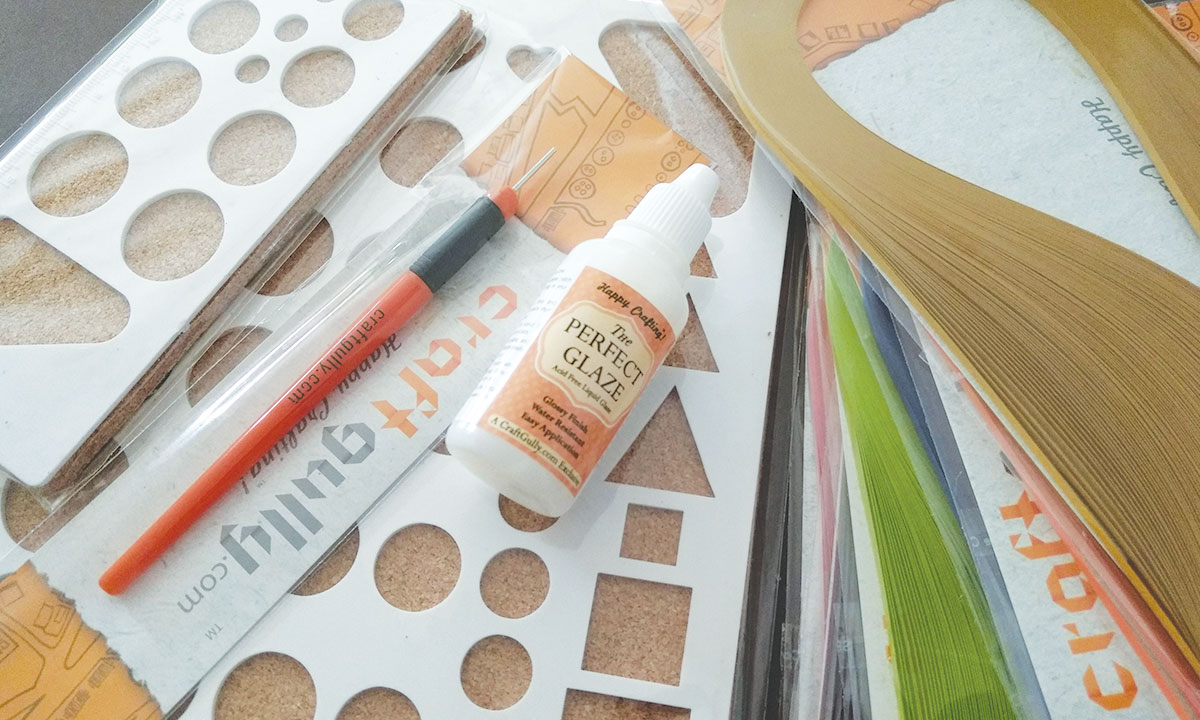
Quilling Needle Tool: The needle tool comes handy when you have to create smaller centres and coils. Simply, curl the paper around the needle and start winding it to make a coil. Once you get the hang of using this one, you can make really tiny coils.
Quilling Slotted Tool: A slotted tool allows you to place the end of the paper strip into the slot and roll it with ease. The tool is ideal for beginners as well as professionals.
Paper Crimper: Also known as a quilling winder, a paper crimper is used to give your paper strip a zig-zag design. Such a crimped strip is then loosely coiled or used as to create long strip shapes.
Quilling Coach: A quilling coach is normally used with the slotted tool. It helps you hold the paper strip and easily wind it into a large coil. Its flat surface keeps the coil intact and prevents it from unwinding unexpectedly. A quilling coach is especially useful for young quillers, as their little hands often need some extra support.
Quilling Comb: Quilled floral art often requires you to create intricate laced loops (also known as husking); these can be made using a quilling comb. The evenly spaced and small, fine metal rods of the comb help you easily create infinite patterns, using one or more paper strips.
Quilling Guides: A quilling guide has grids with concentric circles printed on it. It helps you create a quilled object with a symmetrical design, such as an 8-pointed snowflake or a 6-pointed flower. The grid guide also comes in handy for husking and aligning your paper strips, while braiding or weaving them together.
Quilling Moulds: Quillers use moulds for creating 3D quilled items and quilled jewellery. Once you create a tight coil with a regular quilling tool, simply place it on the desired mould size and push the paper downward to apply the shape.
Quilling Paper Strips: Quilling paper is commonly available in ready-to-use strips of different widths and colours. Most commonly used sizes are 3mm and 5mm, however, wider strips of 7mm and 10mm are also available. It is easy to use strips of these sizes with a slotted tool. Narrow strips are useful for finer quilling designs and wider strips for 3D quilling art and fringed flowers.
Sizing Boards: A sizing board or work board helps you create perfectly circular coils of desired sizes and even coils with off-centred circles. All you need to do is, simply roll the paper strip and place it in the hole of the desired shape and size. Its base is often made from cork, so they can hold straight pins that are used to secure the quilled shapes. These are available in small and big sizes.
Straight Pins: Quillers use straight pins on work boards, to secure the coils or scrolls in place. These are essential to your quilling project as you can alter the quilled shape before gluing it up, while keeping the base/external quilled shape intact.
Tweezers: One of the must-have tools in your quilling kit, a pair of tweezers help you position the paper, handle the coil, glue it up and even assemble the shapes. There are Straight and angled or Curved Tweezers; the Straight Tweezer has a straight point tip, whereas the curved tweezers have a tilted one. Tweezers, in general, are quite useful to most crafters for handling various tasks.
Shiner/ Top Coat: A Top Coat / Shiner acts as protective layer on your quilled projects and helps keep away moisture and dirt. Depending on the project, sometimes multiple coats may have to be applied. The Perfect Glaze by CraftGully works great for quilled jewellery, 3D projects and delicate filigree work.
Husking: Husking is a technique of quilling paper strips into loops for making petals and leaves out of them. This type of quilling requires using straight pins and a grid guide or a quilling comb.
Fringing Scissors: These specially designed scissors have five blades, which can let you create fringed flowers and borders.
Paper Bead Tool: The paper bead tool is similar to the slotted tool and enables you to create a variety of shapes. Of course, the possibility of the shapes depends upon the paper cut. However, this tool can hold several strips of paper and even paper with wider cuts.
Needle Forms: Needle forms enable you to create small paper rings of several sizes. These forms are highly useful if you wish to make quilled jewellery.
Cookie Cutters: These come in many shapes and let you give form to your paper strip by guiding it around the cutter. A cutter also keeps the strip in a designated area.
On-edge Quilling or Quillography: On-edge quilling gives an illusion of a 3D typography. You need to use card stock or stick several uniform-sized quilling sticks together and then make the outline of the letter forms. You can further alter its shape as per your creative instincts.
Quilled Mosaics: Quilled mosaics are beautiful pieces of art, made using wider paper strips. Quillers create basic shapes with an outline of the same colour for each, and combine them to form a mosaic.
3-D Quilling: When a quilled design is not glued to the page, and is instead placed ‘on’ it, it appears standing upward, three-dimensional. 3D quilling or sculpting is possible with wider and heavier paper strips. Examples of quilled items includes, animals, wedding cake toppers and boxes.
Have you come across something that's not on this list? Leave a Comment below and We will be sure to update it! Happy Crafting™!


Leave a Comment